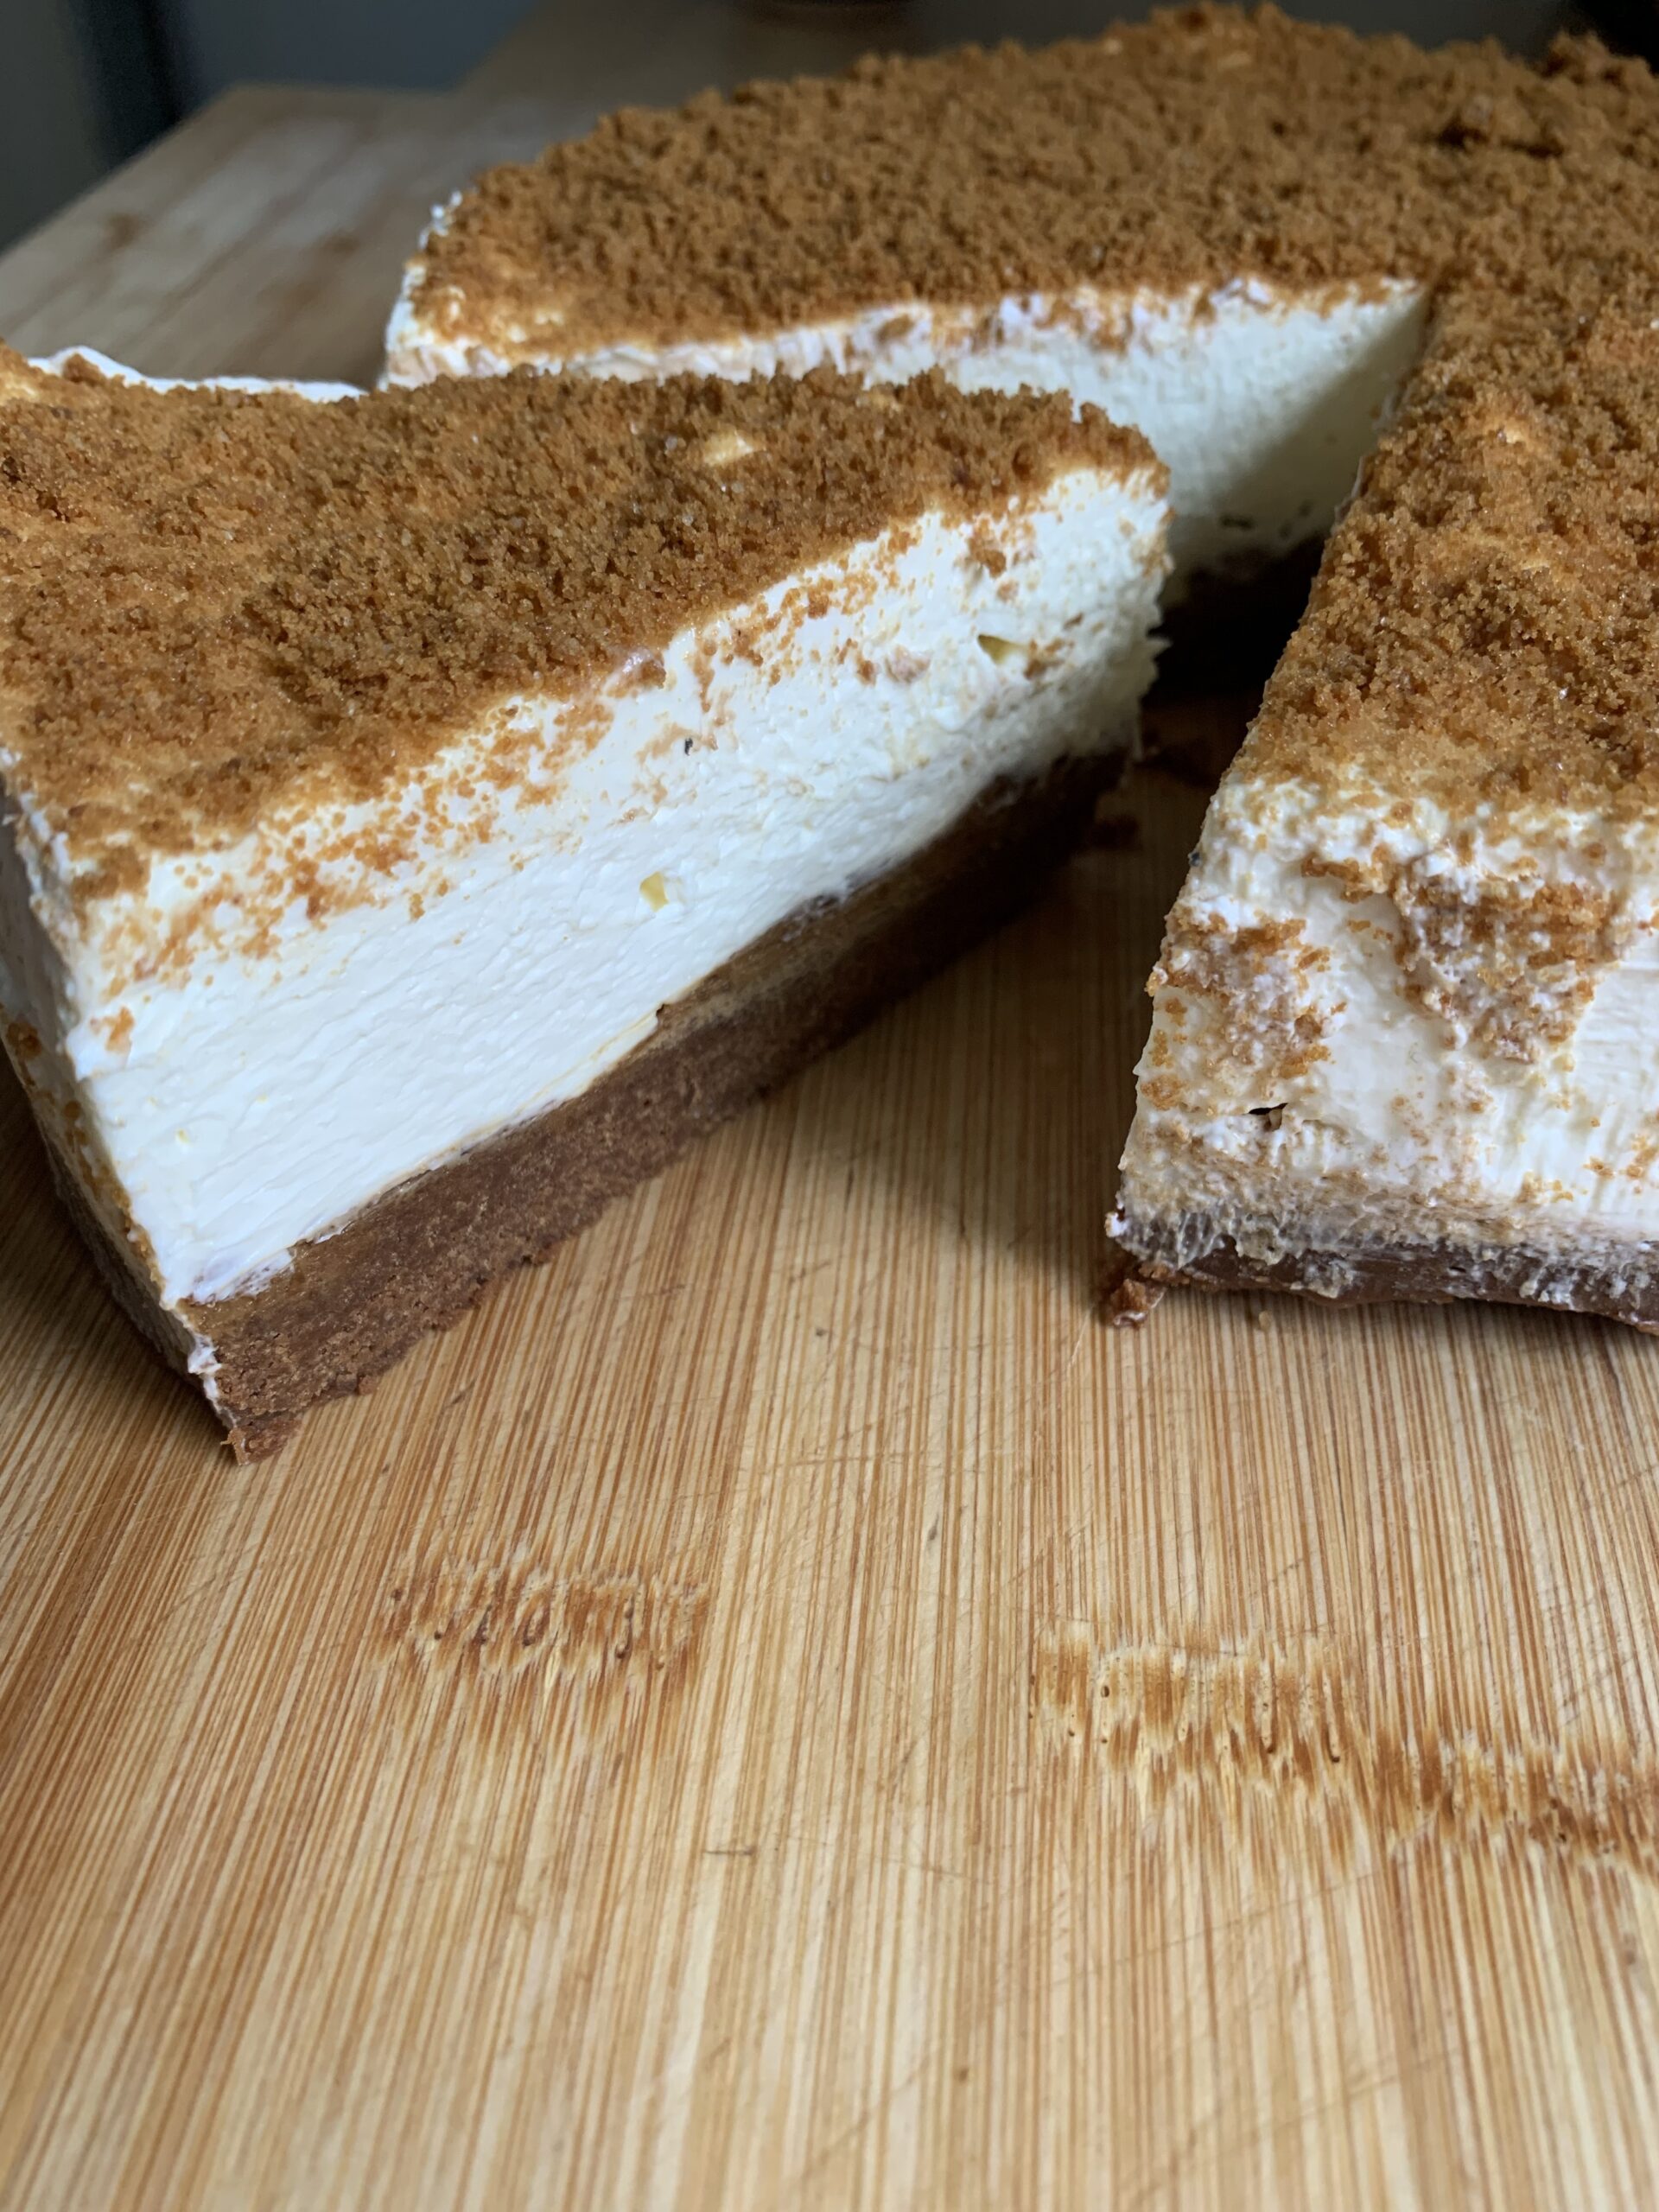
Simple no bake Lotus Biscoff cheesecake recipe
I’m going to go out on a limb here and declare that cheesecake is the best dessert there is, but this Lotus Biscoff cheesecake is the best one hands down!
It is not only super simple to make, it tastes delicious and will be a huge hit with everyone who tastes it. There is no need to have any fancy gadgets and it takes less than 15 minutes to prepare, it just needs a little time to chill but it keeps really well so you could make it a day in advance.
Another thing I love about this cheesecake recipe is the fact that all the ingredients you can get from your local supermarket. When we first planned this Lotus Biscoff cheesecake, I had planned to use the normal biscuits and smooth spread however neither were available with my shopping order and I am glad as this cheesecake recipe is probably the best I have ever made! Now, of course, if you can only get your hands on the normal Lotus Biscoff biscuits and smooth spread, it will work out absolutely fine still and be just as tasty.
As a busy family, we always head toward the easy but tasty recipes and it is clear to see why. After this is prepared, you simply can leave it in the fridge to set and head off to get on with your day. Then after a busy day, you can come back and enjoy what you have made!
No bake Lotus Biscoff cheesecake recipe
Prep time – 10 Minutres
Chill time – 6 Hours
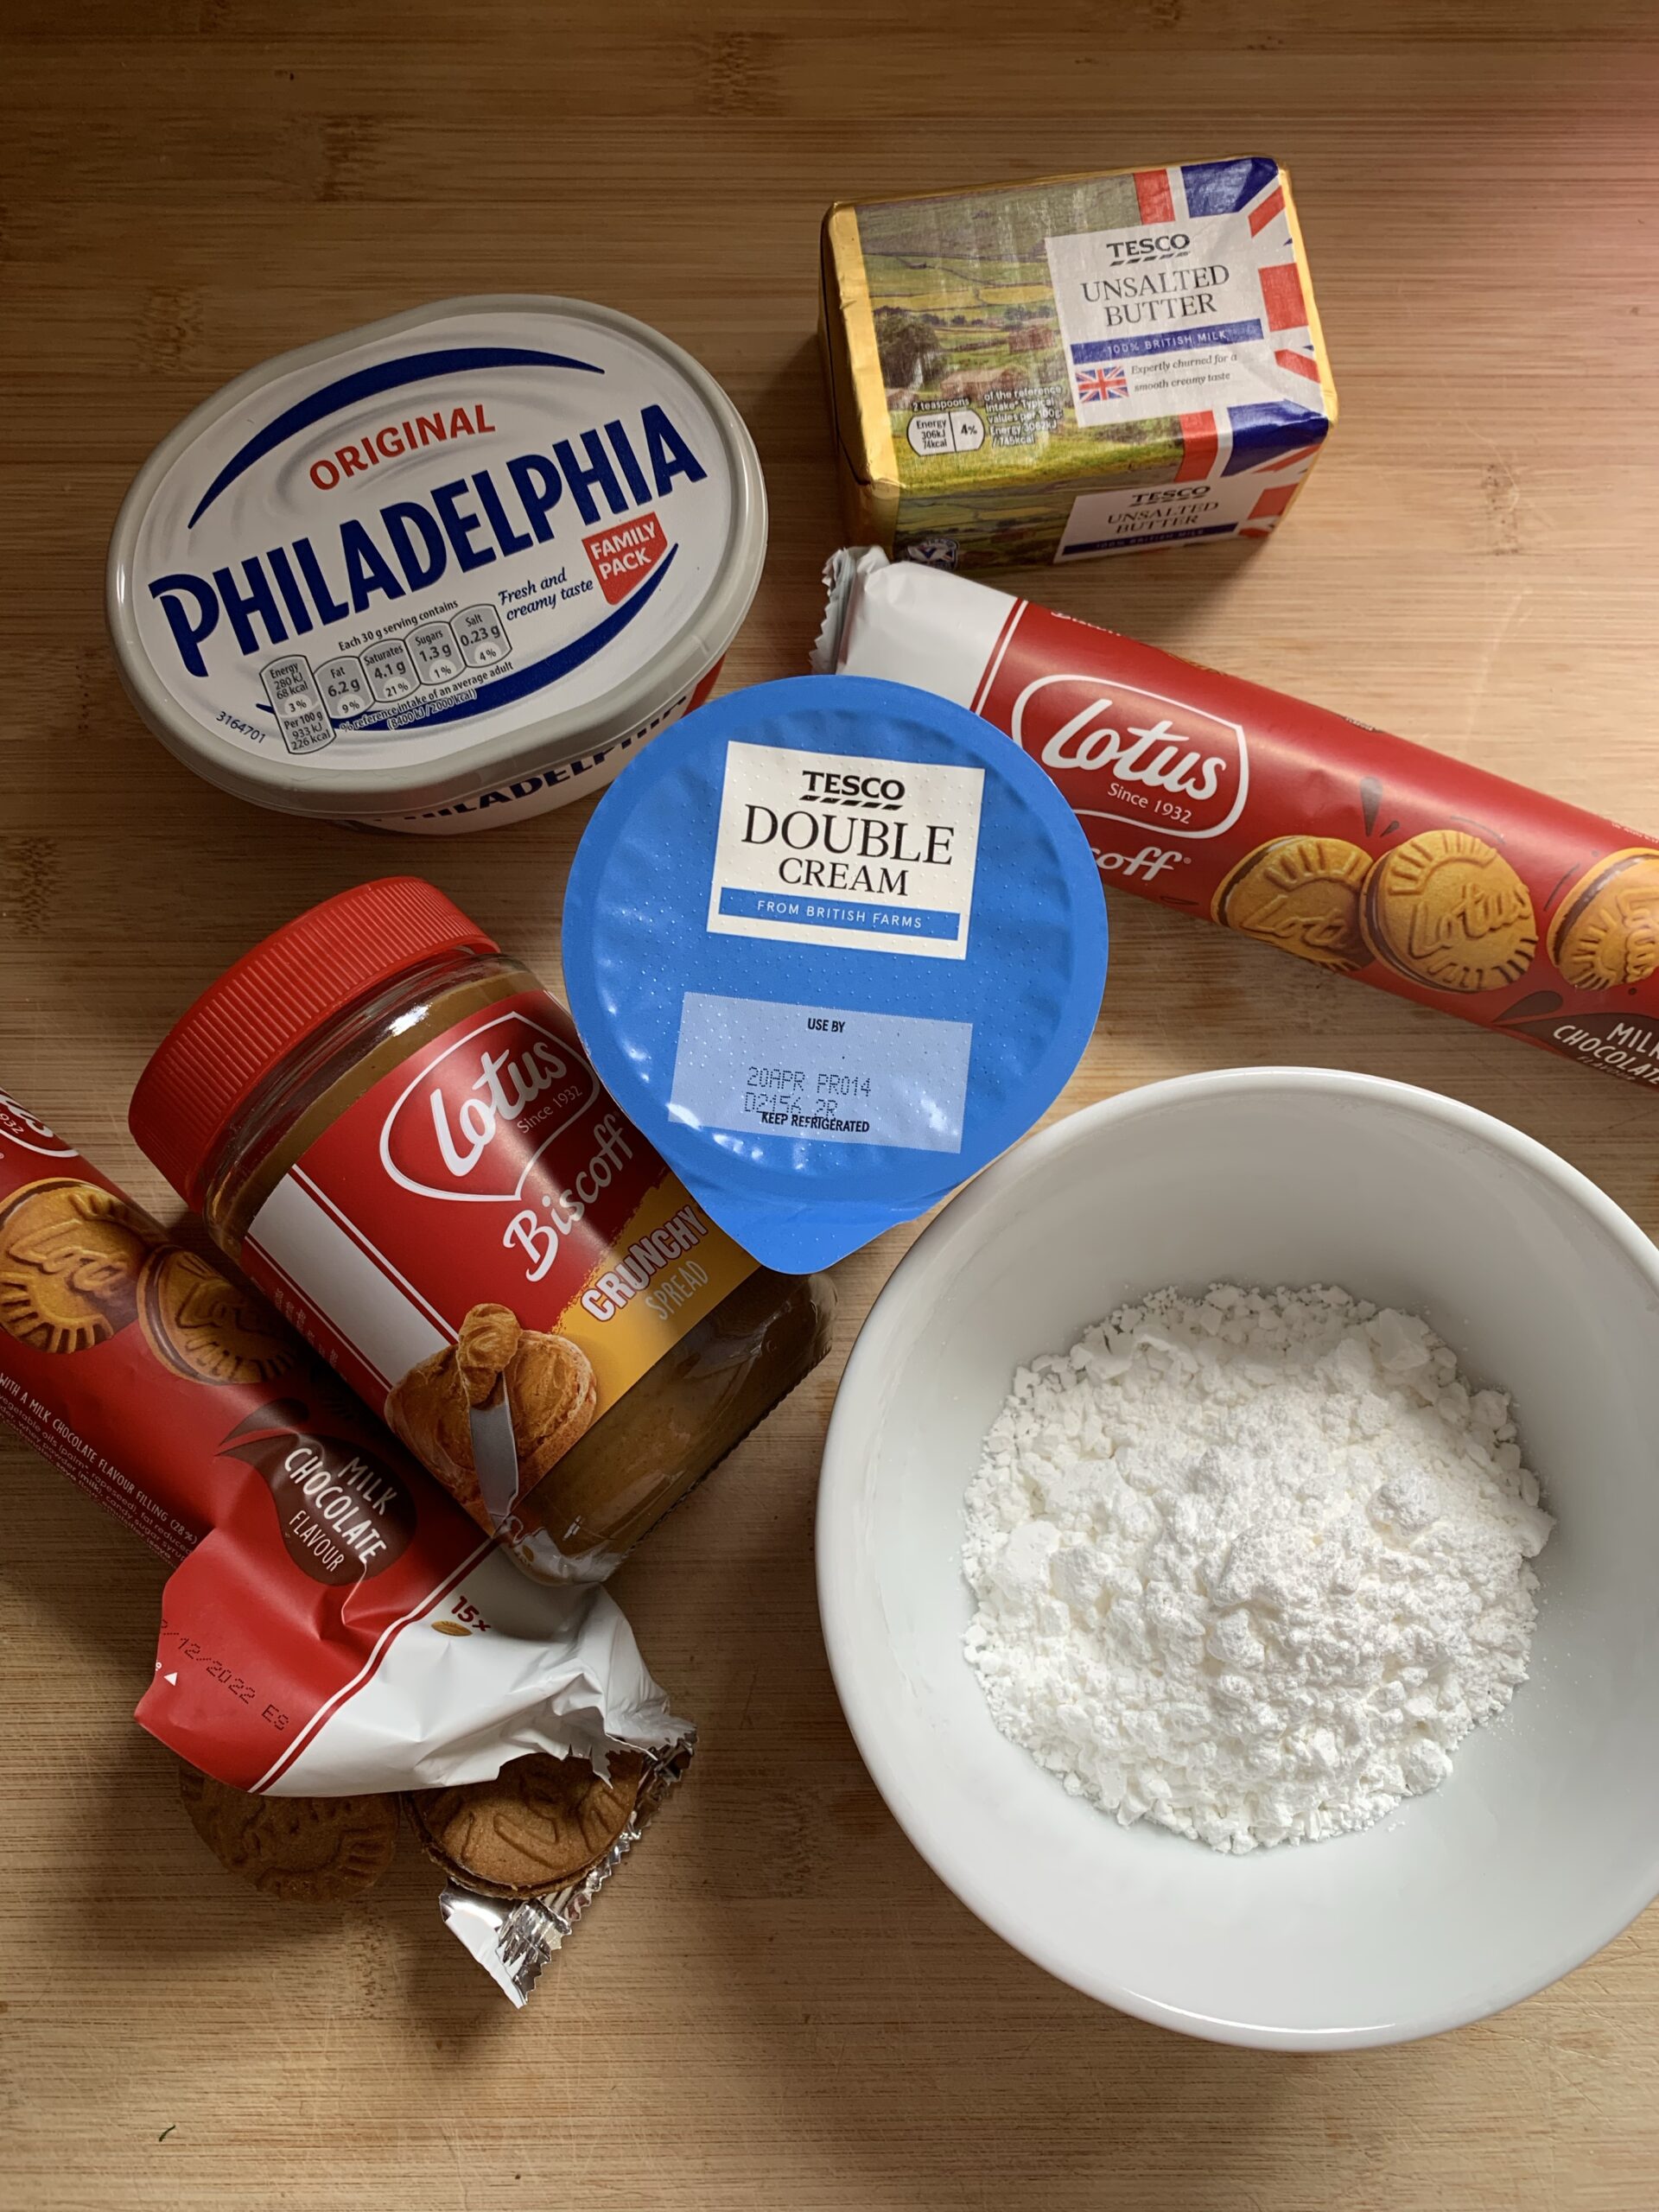
Ingredients
For the base
- 300 g Lotus Biscoff biscuits
- 100 g unsalted butter, melted, plus extra to grease
For the filling
- 500 g cream cheese
- 100 g icing sugar
- 300 ml double cream
- 1 tsp. vanilla extract
- 100 g Lotus Biscoff spread
- For the topping
- 50 g biscoff biscuits
Instructions
- Lightly grease the base and sides of an 8 inch round loose bottom tin. I just used the same ones that I use for cakes.
- Line the in with a sheet of baking parchment cut to shape.
- Making the base:
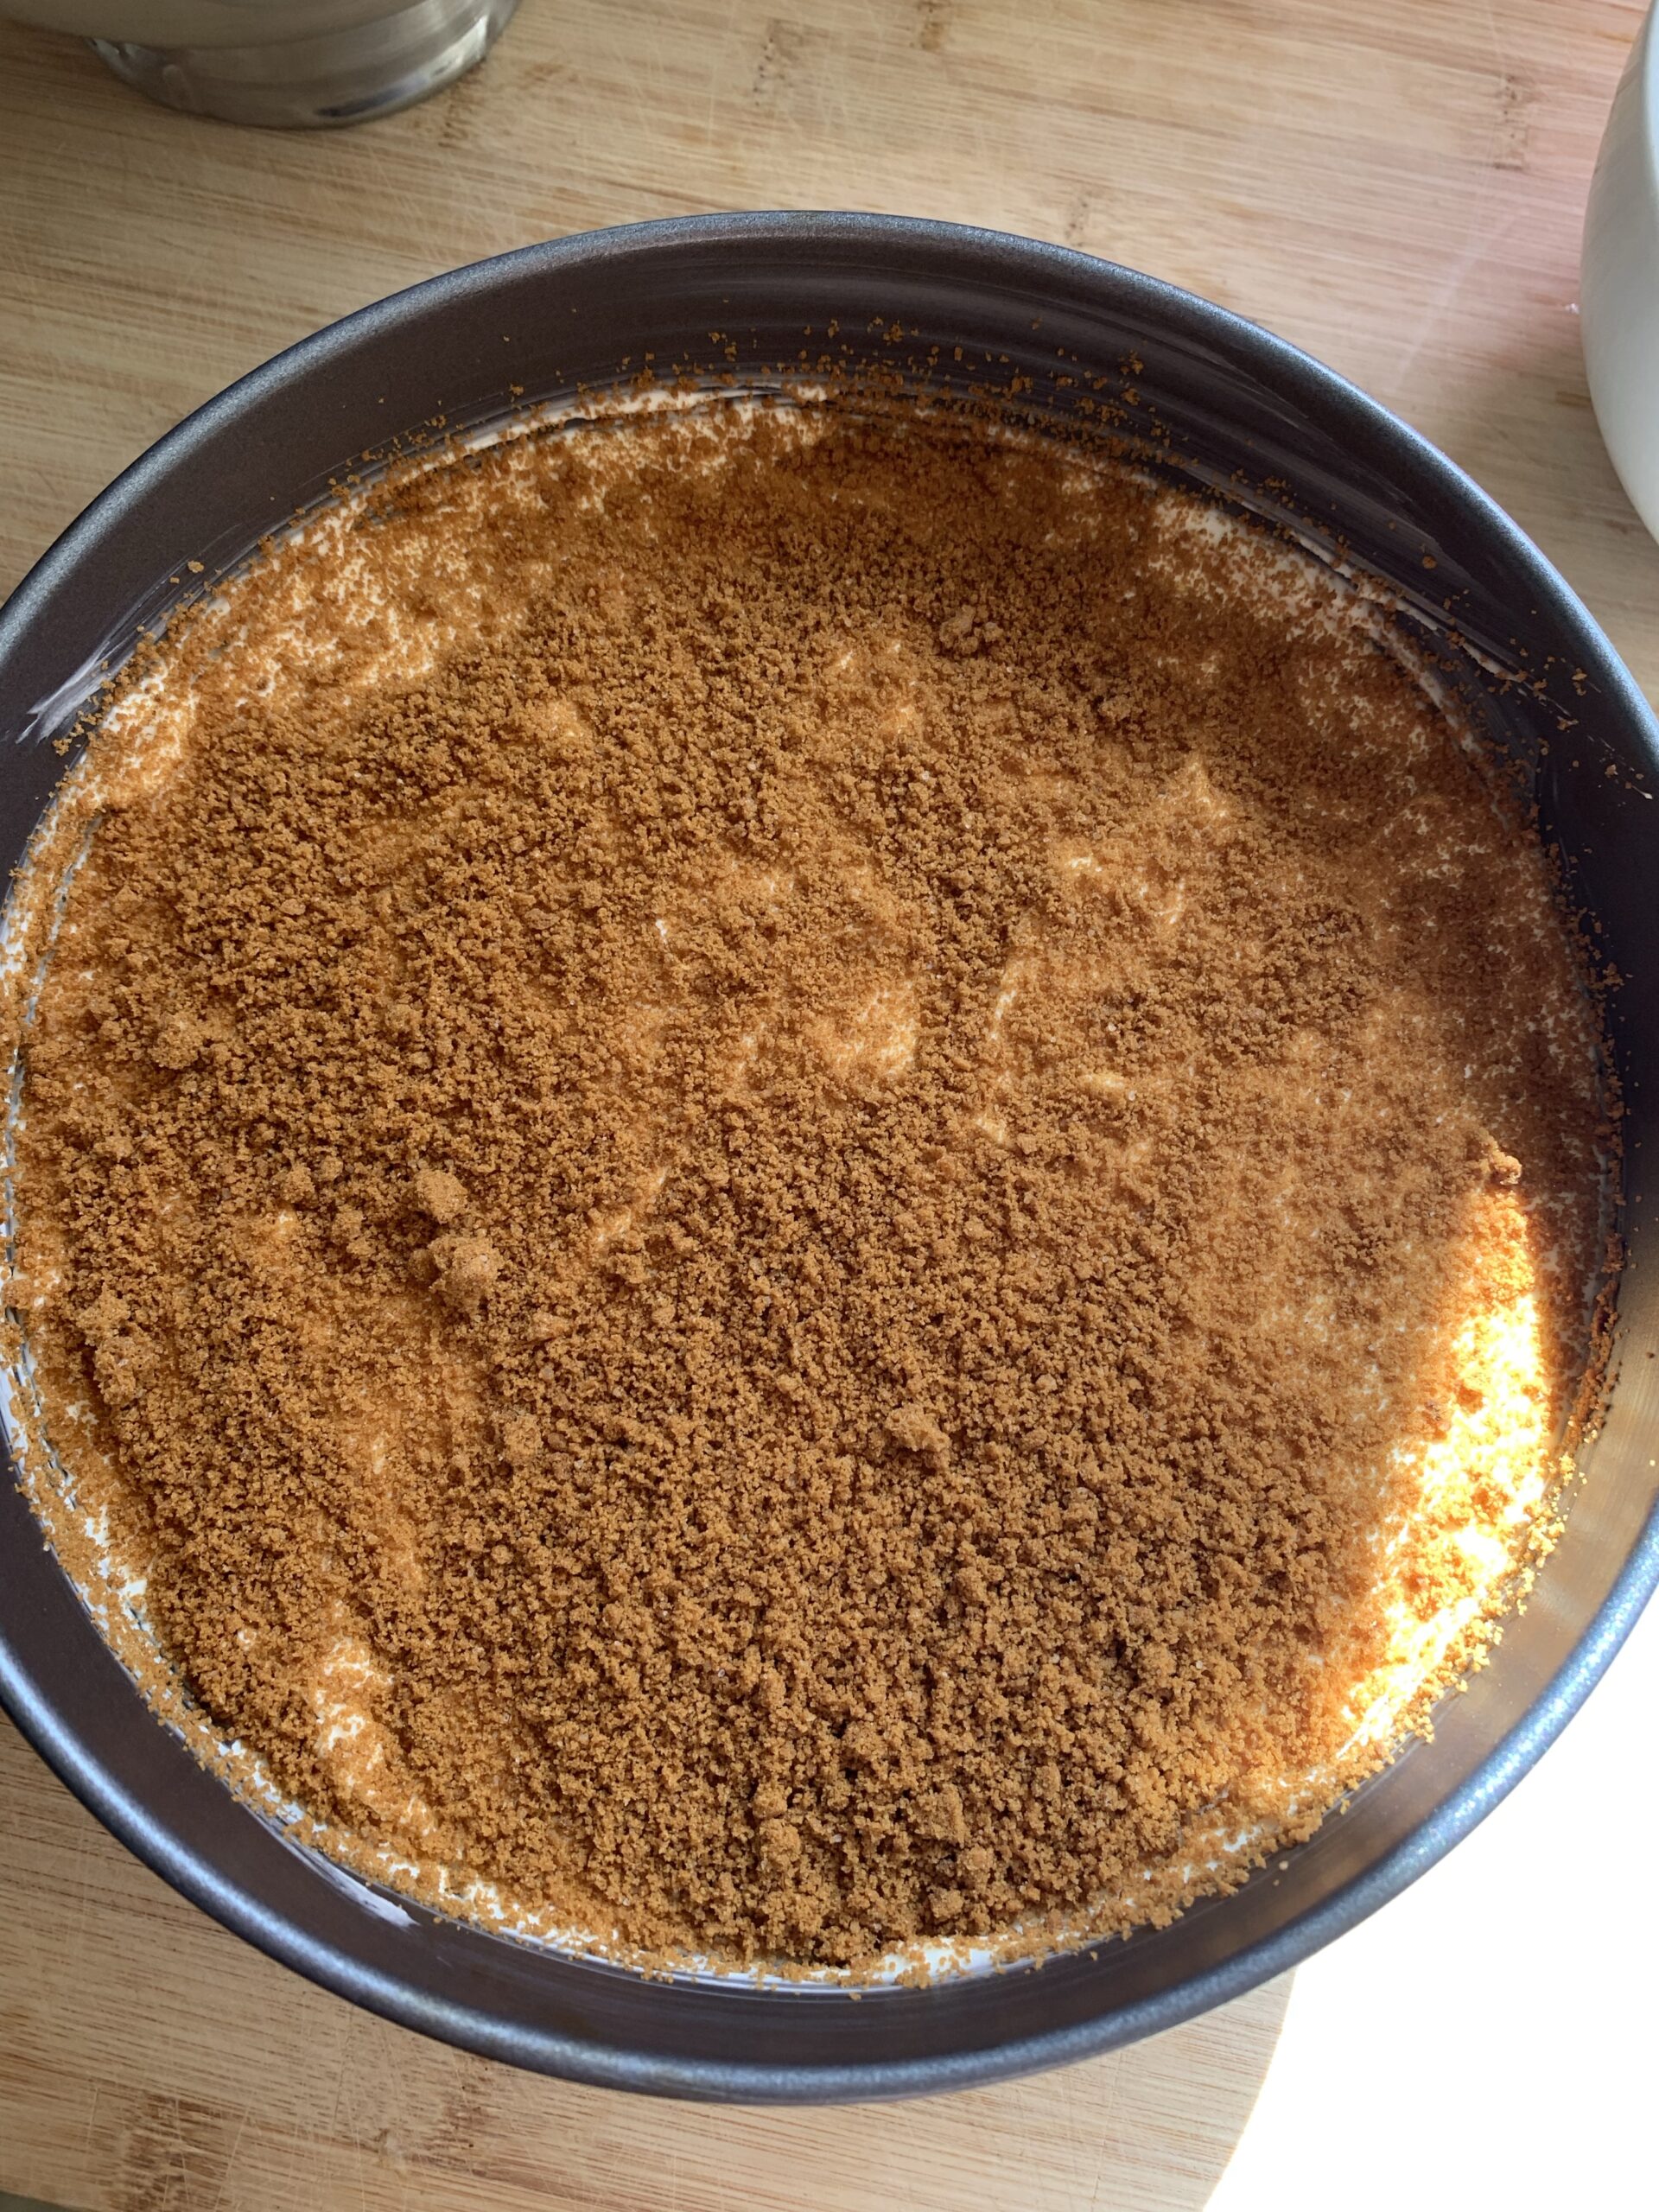
- Whiz the biscuits in a food processor until finely ground.
- Mix the biscuit crumbs into a bowl with melted butter and combine well.
- Tip the biscuit mixture into the base of the prepared tin. Press and smooth down with the back of a spoon. Put into the fridge to chill.
- Making the filling
- Beat together the cream cheese and icing sugar until smooth, then beat in the double cream and vanilla until the mixture is thick and holds its shape. We did this in our mixer but it can be done with an electric whisk or by hand.
- Warm Lotus Biscoff spread in the microwave for a few seconds just to make it easier to spread. Add this to the biscuit base and spread until this is smooth.
- Spoon the cream cheese mixture into the tin, and spread to level.
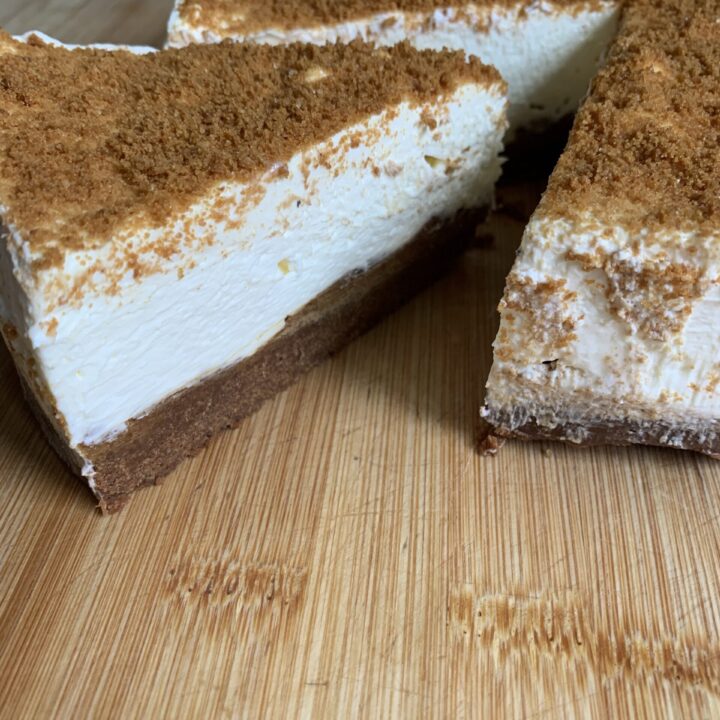
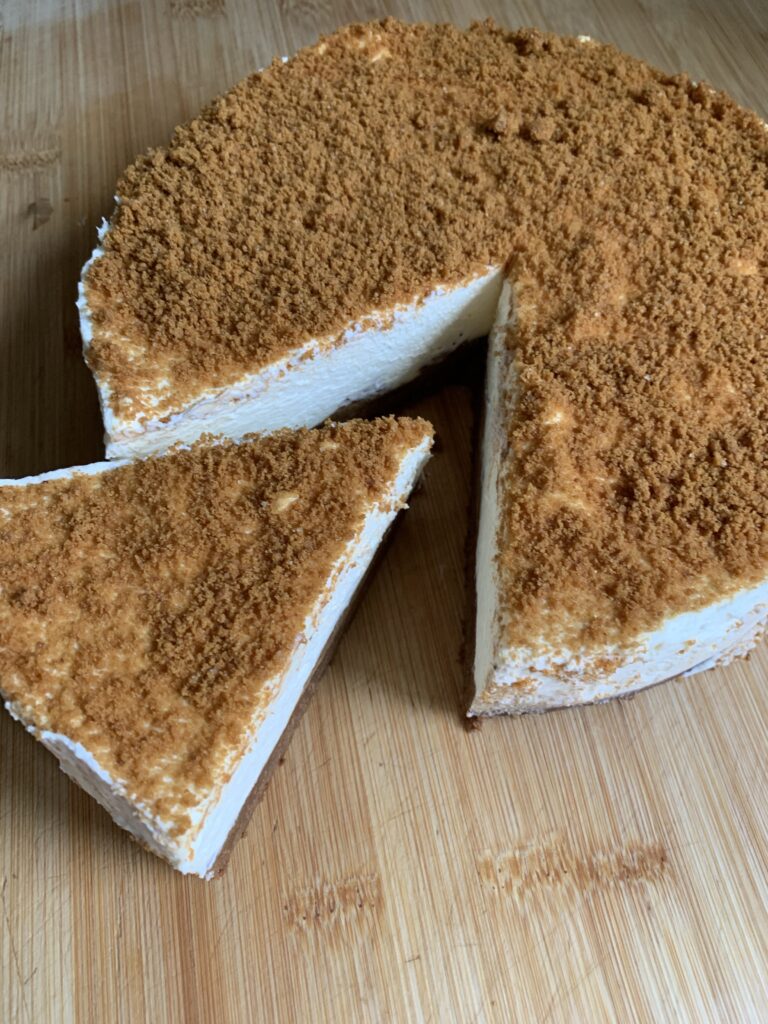
- Blend the extra biscuits until they are crumb and pour over the top of the cheesecake. Gently tap the tin so the crumb becomes an even layer,
- Chill in the fridge for at least 6hr or overnight.
- Remove the cheesecake from the tin and transfer it onto a serving plate or cake stand.
- Enjoy!
If you would like a printable version of this recipe, please see the printable recipe card below!
Simple no bake Lotus Biscoff cheesecake recipe
Ingredients
- For the base
- 300 g Lotus Biscoff biscuits
- 100 g unsalted butter, melted, plus extra to grease
- For the filling
- 500g cream cheese
- 100g icing sugar
- 300 ml double cream
- 1 tsp. vanilla extract
- 100g Lotus Biscoff spread
- For the topping
- 50g biscoff biscuits
Instructions
- Lightly grease the base and sides of an 8 inch round loose bottom tin. I just used the same ones that I use for cakes.
- Line the in with a sheet of baking parchment cut to shape.
- Whiz the biscuits in a food processor until finely ground.
- Mix the biscuit crumbs into a bowl with melted butter and combine well.
- Tip the biscuit mixture into the base of the prepared tin. Press and smooth down with the back of a spoon.
- Put into the fridge to chill.
- Making the filling
- Beat together the cream cheese and icing sugar until smooth, then beat in the double cream and vanilla until the mixture is thick and holds its shape. We did this in our mixer but it can be done with an electric whisk or by hand.
- Warm Lotus Biscoff spread in the microwave for a few seconds just to make it easier to spread. Add this to the biscuit base and spread until this is smooth.
- Spoon the cream cheese mixture into the tin, and spread to level.
- Blend the extra biscuits until they are crumb and pour over the top of the cheesecake. Gently tap the tin so the crumb becomes an even layer,
- Chill in the fridge for at least 6hr or overnight.
- Remove the cheesecake from the tin and transfer it onto a serving plate or cake stand.
- Enjoy!
Do I need any special equipment to make this cheesecake?
The only thing you do need is the tin, we use one like this. Everything else there are options to make it without using the equipment. However, if you have a mixer/electric whisk and a processer it will make it a little quicker and easier for you.
How long with this cheesecake last?
This cheesecake will stay in the fridge fine for 3 days as long as it is well covered, however, I really doubt it will last that long! If you are planning ahead for a special occasion and are going to decorate with additional lotus biscoff, hold off putting these on until you are about to serve. It will just make it easier to cover in the fridge.
Can you freeze cheesecake?
You can freeze this Lotus Biscoff cheesecake however, it won’t be as tasty as it is fresh.
If you decide you want to freeze it, the best way to do this would be once it has completely chilled, slice this into portions and then wrap each portion in cling film followed by foil. This just keeps it protected better and allows you to only defrost what you need. I would recommend only keeping it frozen for up to a month.
We have demolished a few of these Lotus Biscoff cheesecakes to ensure the recipe is just right and it is so delicious, that it doesn’t last very long in this house. I have even served mine with extra melted spread and that just adds another whole level of sweetness to the plate. If you wanted to make it a little fancier for a dinner party, why not add whole biscuits to each slice to give it a bit of wow factor or maybe even add a drizzle of spread to the top just before serving.
Whatever you do, we’d love to know how you get on with this recipe in the comments below! Don’t forget, if baking is more your thing we have these gorgeous toffee brownies to try or even our favourite white chocolate and cranberry cookies.
We love cheesecake, and this looks like a scrumptious recipe!
Looks delicious. Love Biscoff biscuits
Cheesecake is a favourite of mine, and this does look extra tasty!